Showing posts with label 3D Art Production. Show all posts
Sunday, 17 April 2016
Thursday, 7 April 2016
Week 23 - Particle Effects in Unity
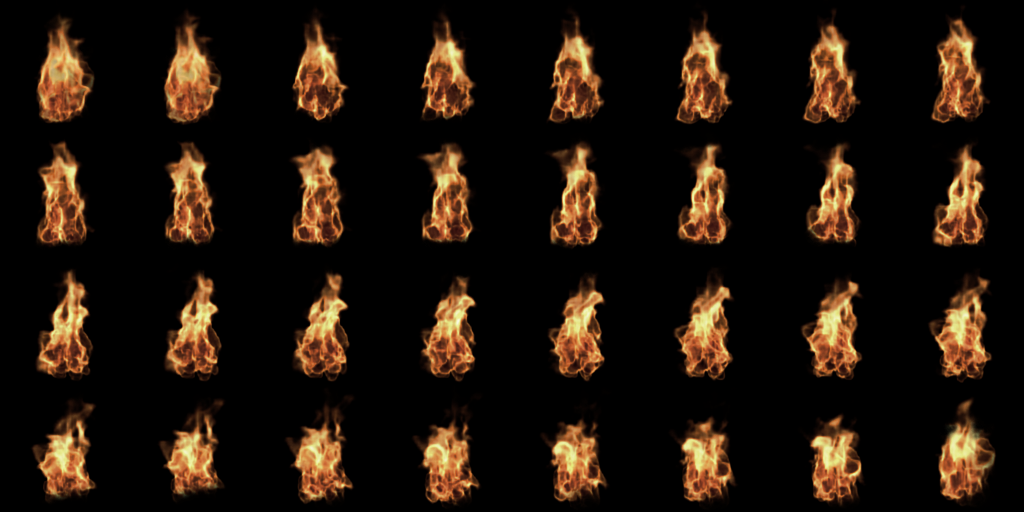
For this weeks session we learned how to use particle effects to make fire and smoke.
We were given a simple scene to work with where we added the smoke and fire onto.
First we created the fire, adjusting it to how we wanted to make it look as realistic as possible. We copied over the fire to create the smoke but changed the image, colour, size and rotation and other aspects so that the particles acted more like smoke.
These are the images we were given to create the two.
Overall this is what the final product looked like. I enjoyed learning this and would like to hopefully do something similar for the waterfall in my battle arena.
Monday, 14 March 2016
Week 21 - Animation in Maya
In this session we looked at animating in Maya and rigging.
First we learned how to animate a bouncing ball. Then made something move along a path. And lastly we looked at rigging a cylinder to make it bend.
It all seemed relatively straightforward but I found it difficult to get used to and get the hang of each of these animating techniques.
Thursday, 28 January 2016
Week 17 - Hand Model
Last lesson we were taught how to make a hand.
I started with the fingers and tried to make them stocky and short like my dwarf design.
I decided on a slightly different design to my original. I intend to bring the glove and bracer into Zbrush and try some of the cloth brushes I have seen people use.
I'm not sure if the statue will be in the smoothed mode but this is how it looks. I feel the regular mode fits the style more but this looks more realistic.
I also went back to the head we had made for one of the lessons and worked on it and adjusted it to look like I wanted it to. I'm not sure how I will be making the beard yet but I think the rest of the features look okay.
Friday, 15 January 2016
Week 14 - Statue Concepts
As I already knew we would be making a statue this term, I made a podium in the fountain of my battle arena. On this podium I wanted a statue that would fit the image. I decided on a regal looking dwarf as the placement looks quite important anyway.
I had a style in mind and the words regal, Celtic, Dwarven and warrior. I looked online to find some ideas and found some statues with interesting patterns. I also knew I wanted a weapon incorporated in the statue so looked at some good designs.
I began by doing some pencil sketches. I really like the face design and think it can be interesting to model.
I wanted to get an anatomy reference picture but it was almost impossible to find any decent ones for dwarf proportions.
Although this isn't exactly the proportions I had in mind for my character, I used it a base, though I couldn't find any which I liked facing forward.
Using images I found online and cropping them, I patched together an idea for my character.
I then went over and sketched my version to use for my model.
I then searched for a 3D model with it's wireframe showing to help me actually model though this. I can't just make a taller male's body and shrink it as the proportions are different but this picture is also different to what I had planned so I'm not sure how this will turn out.
Friday, 8 January 2016
Week 13 - Modeling a Face
In this weeks 3D lesson we looked at modeling a face using reference as we will soon be making a character statue.
We imported images into Maya, one on the side view and one on the front view. Using this I aligned the vertices in all directions. There was no reference for the back so there was a lot of guesswork involved and it took a while but this was good practice for my statue.
Tuesday, 17 November 2015
Week 09 - Axe Prop
Today I decided to work on some of my props for my battle arena.
I started sketching an axe and a sword, as I had included weapons in my mindmap. I knew I wanted some sort of Celtic design/pattern on it so I tried some out. Next I made a quick model in Maya. I left it relatively simple to keep the triangle count as low as possible as most of the detail could just be added on with a texture.
I rendered the model in Maya and saved the picture. I then opened it in Photoshop, copied it twice and edited the levels to make it clearer to see.
I wanted to think about what sort of designs I could use without having to sketch it out each time or texture it and found painting over the model in Photoshop to be very quick and helpful. I thought of what both a wood and metal axe would look or leather parts on the metal. I like how all of these look though I feel I could add more Celtic style patterns in the metal to make them all look like they are part of the same scene.
I will definitely use this again, probably for sketching the patterns on the fountain or column.
Monday, 26 October 2015
Week 06 - Mushrooms
In today's lesson we started learning how to make mushrooms. As a lot of people were having trouble with this, we didn't get round to finishing it so I decided to finish mine at home. I made a simple brown mushroom with a rough texture.

I still had the file I was painting on open in Photoshop so I decided to carry on painting a few different mushrooms too in brighter colours as I wanted them to look more magical then realistic while still looking believable. I saved each of these different textures as different files and assigned them to some duplicated mushroom. I rotated and stretched them all to make them look more like a real bunch of mushrooms.
I noticed that the stems of the mushrooms all have a line going through them. I had painted it all correctly and evenly as possible so that would be just where the UV map joined back together but I wasn't sure how to fix this.
I really liked making these and will probably continue as I may be able to fit them into my walking simulator.
Wednesday, 7 October 2015
Week 03 - 3D Column
In this week's lesson we made a 3d column using reference.
This is the image we used. We used it as a texture on a plane so we could model next to it.
This is the model I made. Some parts are off which I didn't realize until after I had made it such as the indents on the ends which are too deep. This was good practice for me as I'm going to be using columns in my arena, though these are Greek style so I would need to make them slightly differently.
Saturday, 3 October 2015
Week 03 - Arena Render Mindmap
We were asked to make a basic, rough version of our battle arena in Maya to then annotate with images of what is going to go where. I really enjoyed experimenting and got carried away by adding a lot of bricks and ruined walls.
I decided to stop where I was so I could step back and take a better look at what I was doing. Looking at this now I would like to make the ceiling part a little taller and also make the waterfall much higher so it is towering over the ruins.
Obviously I didn't add every detail just yet so I made a mind map with the images from my previous mood-board. Having images to relate to the currently simple model helped clear my thoughts and put a bit of order to this idea as it is still all coming together.
Thursday, 1 October 2015
Week 02 - 3D Barrel Edit
I wasn't happy with the first texture I made for this barrel so I went back into Photoshop to try and fix change some parts.
I didn't like the harsh colour of the wood so I changed the texture image I used and changed some of the colour values. The planks in the first design also looked very merged together so I chose a more obvious image which I think looks much better. I did the same for the top and bottom of the barrel but added a different texture for the rim. I didn't realise just how much of a contrast there was between the two textures as the screen lighting was different.
The difference in colour on the top is not so obvious in this view as it just looks like light shining on it but I will have to change that anyway. I think I will remake the barrel from scratch if I have the time because I would like to add more metal rings and adjust the shape.
Wednesday, 30 September 2015
Week 02 - Arena Mindmap
Before starting the battle arena, we made a mood-board of images to help inspire us. I added so annotations to pick out what I like about each image and how I would like to use it.
I decided to go with a Celtic/Dwarven style of ruins, more like a battle area then arena. I like intricate carvings in wood and stone and think that would add a lot interesting detail to the final model. Not all of them will work well together so I will have to experiment when I start making the arena. I'm looking forward to creating my own ruins by piecing together all of these ideas.
Saturday, 26 September 2015
Week 01 - 3D Barrel
This week we started making a barrel in Maya. As homework we finished it, including painting texture in Photoshop and applying it onto the barrel.
I used overlay and multiply with some basic wood, rust and cork textures. Having the layers on normal looked very fake so I painted over them. For example, I used low flow on a brush to go over the rust to give it the right colour and texture.
This was my first attempt at texturing but I'm not happy with certain parts. The edge on the top uses the same plank texture as the rest of the barrel which is not realistic. I also find the colours too harsh and the wood doesn't look worn like the rusted metal.
Subscribe to:
Posts (Atom)